

User guide#
Sending files#
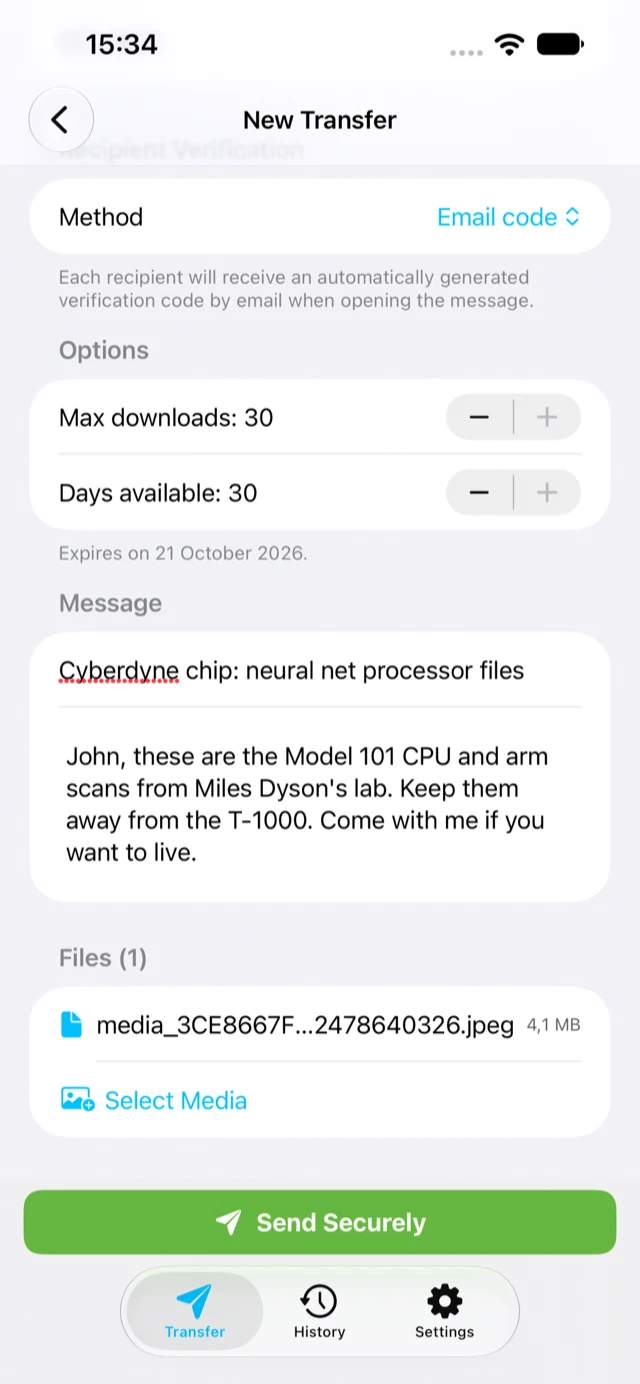
- On the Transfer tab tap Send Files for documents from the Files app, or Send Photos & Videos for your photo library. The file picker opens right away; you can add more files later with Select Files / Select Media at the bottom of the form.
- Add recipients (see below).
- Choose the verification method.
- Optionally set a subject, a message, the number of downloads and the retention period.
- Tap Send Securely.
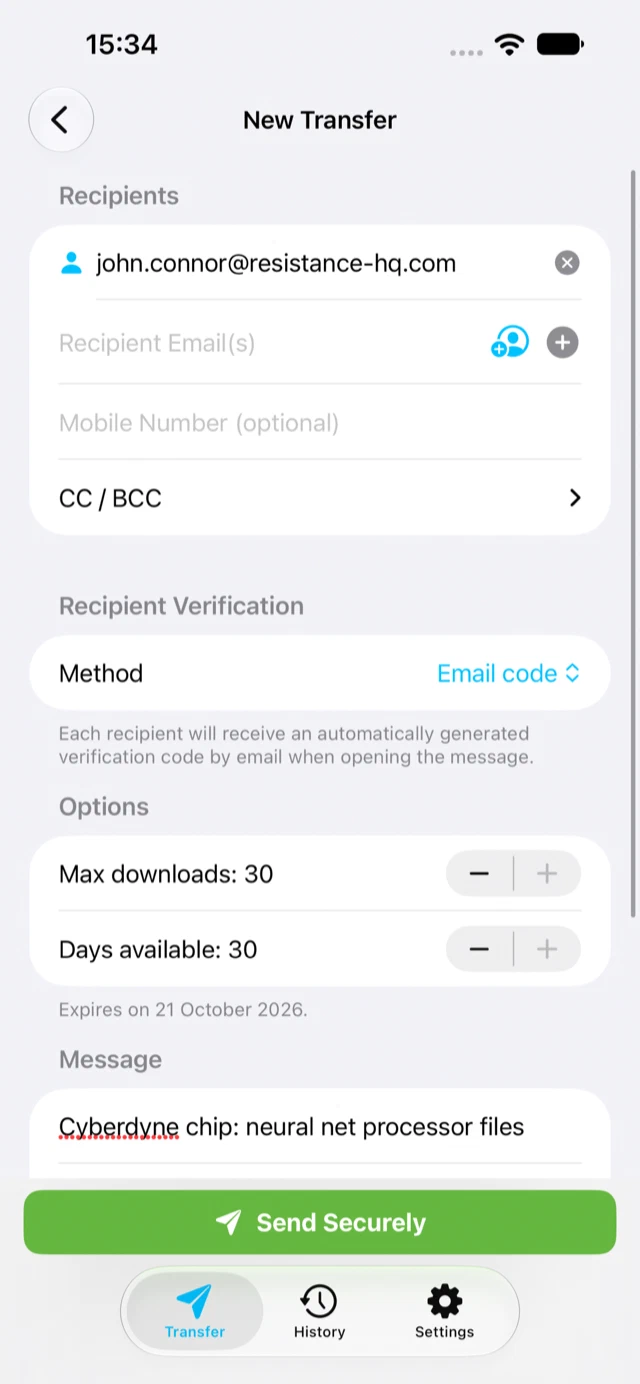
While the transfer uploads, the app shows the progress and keeps the screen on. Keep FileCap open if you can; if you do switch to another app or lock the phone, the upload continues in the background and the app finishes it when you return. Tap Cancel Upload to stop.
After a successful upload the app shows the transfer ID and, for password-protected transfers, the password.
Photos and videos#
Large videos are exported from the photo library before they can be sent. The form shows the progress of that preparation and lets you cancel it. Photos and videos keep their original quality.
Sharing from other apps#
FileCap appears in the iOS share sheet. In Photos, Files, Mail, Safari or any other app, tap Share and choose FileCap; the files land in a new transfer. Documents can also be opened with Open in FileCap. If FileCap is not in your share sheet yet, scroll to More and enable it.
Recipients#
- Type an email address and tap +, or tap the contacts icon to pick someone from your contacts. If a contact has several email addresses or phone numbers, the app asks which ones to use.
- You can paste several addresses at once, separated by commas, semicolons or spaces.
- Each recipient is checked with the server as you add it; addresses or domains that your organization does not allow are refused with a message.
- For SMS code verification every recipient needs a mobile number. Enter it in the Mobile Number field before tapping +; the contact picker fills it in automatically when the contact has a mobile number.
- CC / BCC opens fields for copy recipients.
Verification methods#
The methods offered depend on your organization’s server policy; the app only shows what the server allows and preselects the server’s default.
| Method | What the recipient does |
|---|---|
| Email code | Receives a one-time code by email when opening the message |
| SMS code | Receives a one-time code by text message; needs a mobile number per recipient |
| Password | Enters a password you set (or the server generates); you pass it on yourself |
| Company password | Uses a shared password agreed with that company (configured by your administrator) |
| None | No verification, only when the server allows it |
Some servers require a second verification method; the form then shows a second picker.
When you choose Password, the app checks your password against the server’s rules while you type. After sending, Send Password by SMS opens the Messages app with the recipient’s number and the password prefilled, so the password travels over a different channel than the download link. On devices that cannot send text messages the password is copied to the clipboard instead.
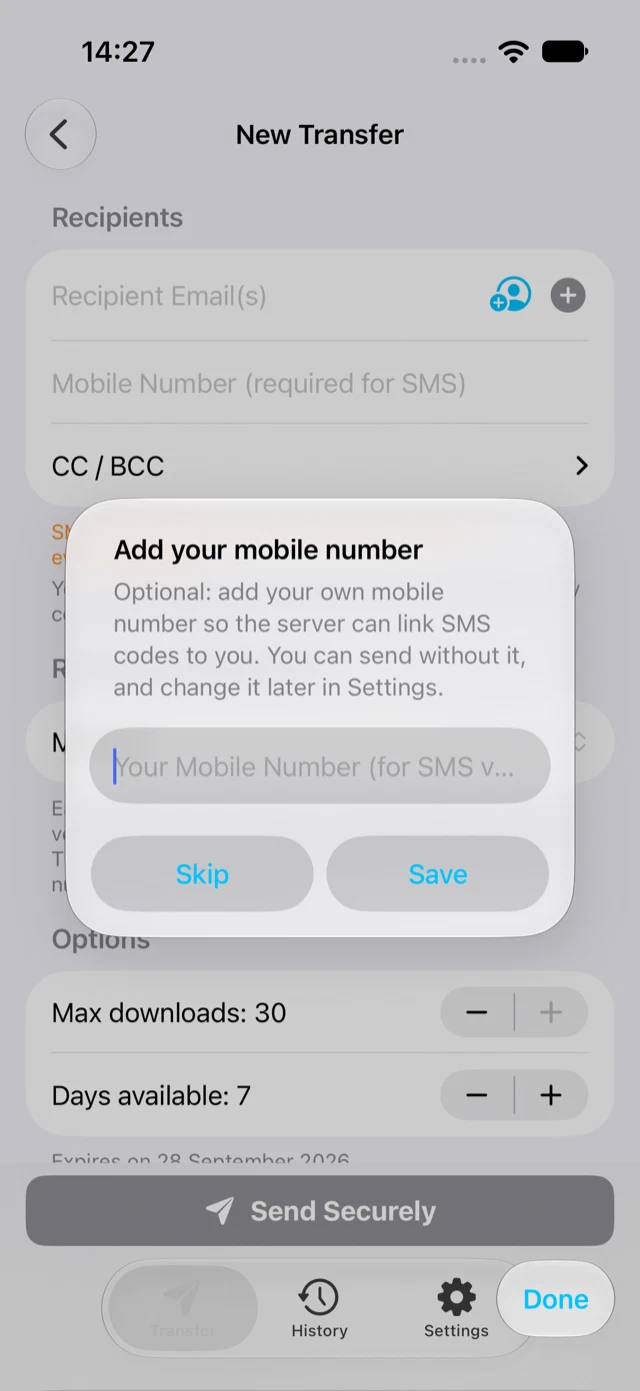
The first time you choose SMS code without your own mobile number configured, the app offers to add it. This is optional; sending works without it.
Options#
- Max downloads: how often the files may be downloaded.
- Days available: how long the files stay on the server; the expiry date is shown below the field.
Both are limited to the maximums your organization allows. If the server fixes a value, the app shows it read-only.
History#
The History tab lists every transfer sent from this device, with recipients, files, date and status. Tap a transfer for its details, including the transfer ID and, for password-protected transfers, the password.
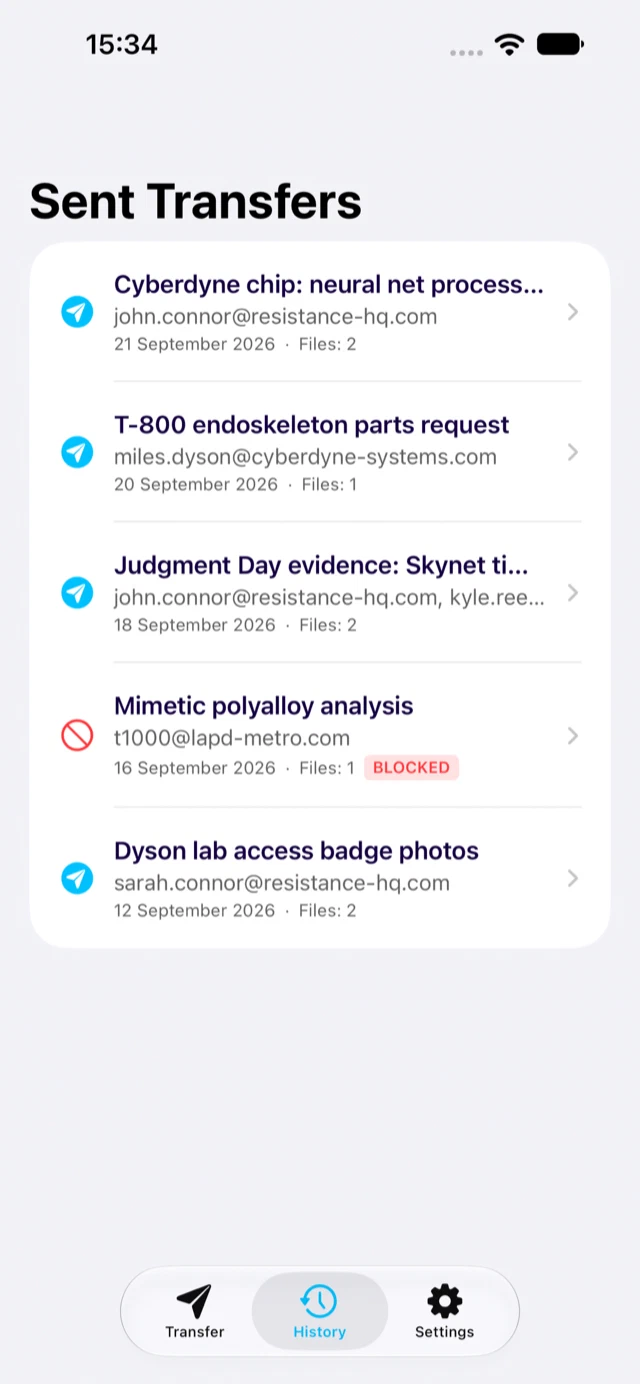
History is stored on the device only. It is not shared between devices and is lost when the app is deleted.
Withdrawing (blocking) a transfer#
Sent something to the wrong person? Open the transfer in History and tap Block Transfer…. The app shows the recipients and files that will be affected; confirm with Block. Downloads stop immediately and every recipient is notified that the message was withdrawn.
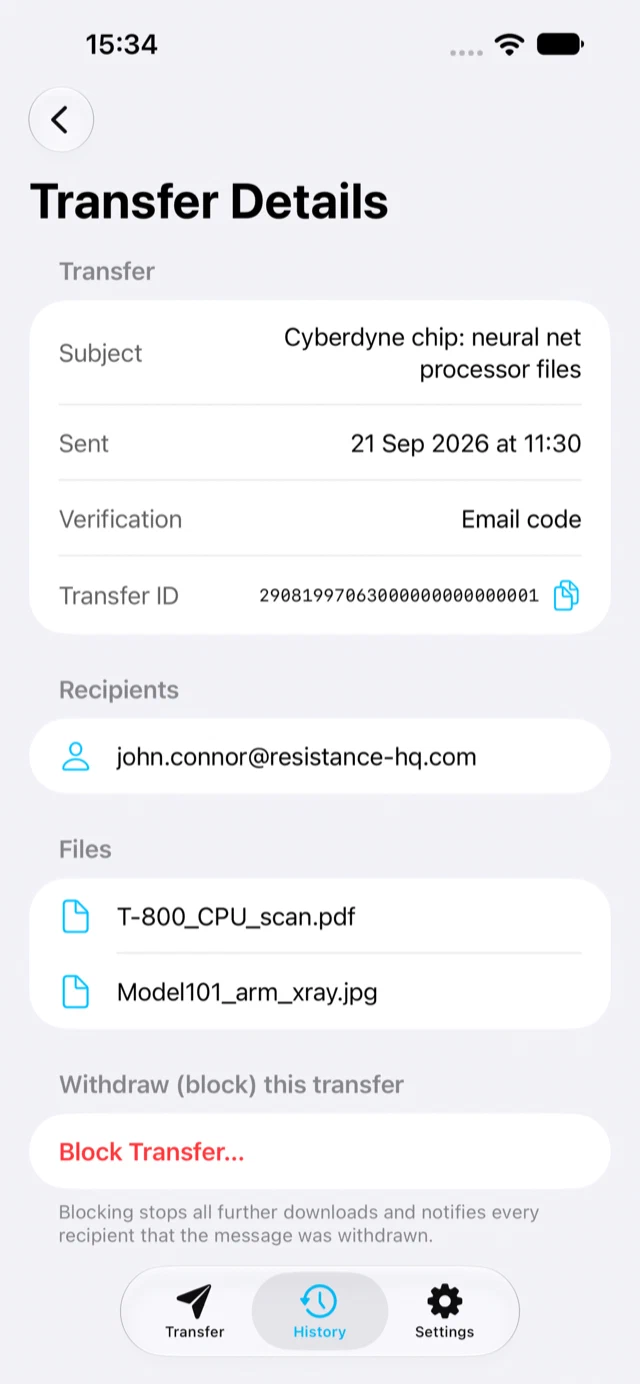
On FileCap servers older than 2026.10 the app asks for the Block ID first. You find it in the notification email FileCap sent you when the transfer was created (the blockId value in the block this message link).
Requesting files#
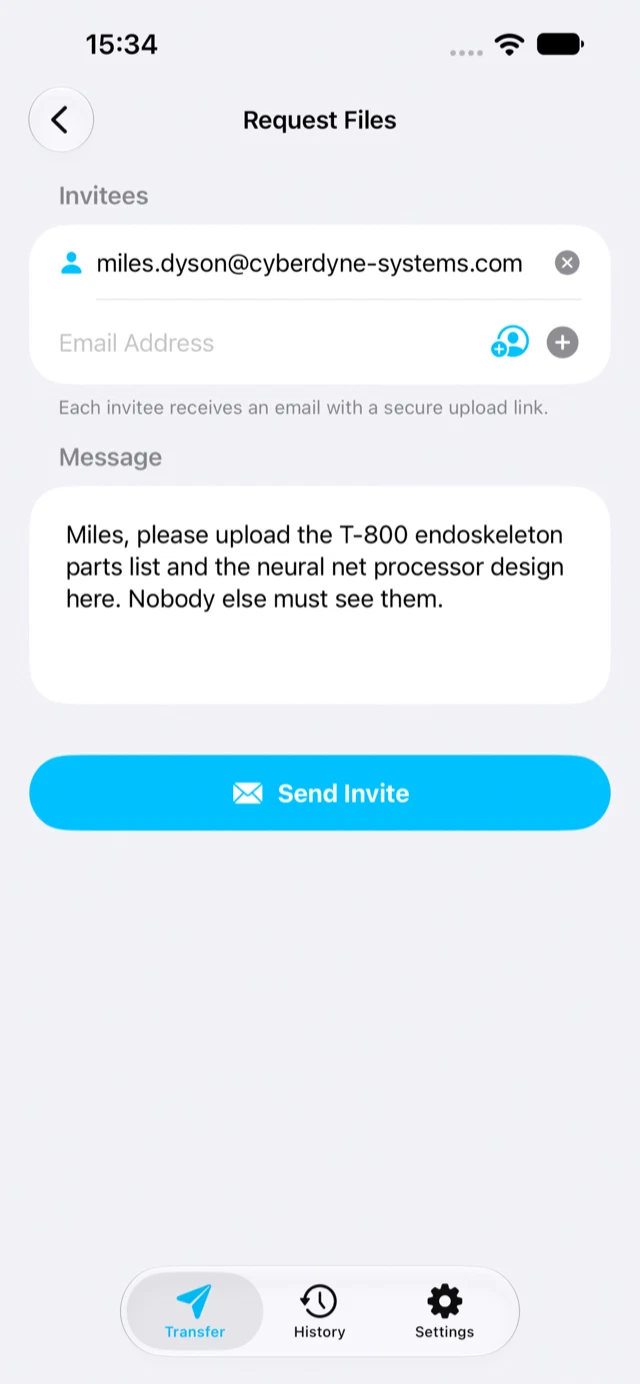
Need documents from a customer or supplier? On the Transfer tab tap Request Files, add the people you want files from, write a message and tap Send Invite. Each invitee receives an email with a secure upload link; they do not need an account.
Settings#
- Server Configuration and User Info: see Getting started.
- Transfer Defaults: the download count and retention proposed for new transfers.
- Verify Connection: checks the server and refreshes the policy.
- Server Policy: the server version, allowed verification methods and whether protection is mandatory.
- View Logs: the app’s diagnostic log, with Email Logs to Support to send it to FileCap support (see Troubleshooting).
Values shown with a lock icon are set by your organization and cannot be changed on the device.
Languages and accessibility#
The app follows the language of your device and is available in Dutch, English, German, French, Spanish, Italian, Swedish, Norwegian, Danish, Finnish, Polish, Portuguese, Turkish, Czech, Romanian and Ukrainian. All controls are labelled for VoiceOver and the text scales with Dynamic Type.