

Configuring MSGraph permissions
When do you need this?#
Microsoft Graph permissions are only needed when Restore original mail item after sending is enabled under Configuration > Add-ins > Office 365. Without that option, users get no Microsoft Graph consent prompt and you can skip this page.
After enabling the option, download the manifest.xml again and redeploy the add-in with it. The admin interface shows this reminder as well.
This short guide describes how to manage consent in Microsoft Entra ID (formerly Azure AD) so that end users can sign in with FileCap without requiring an administrator every time.
Important: These settings are entirely the responsibility of the customer’s tenant administrator. We cannot enforce this. If Microsoft changes classifications or default behavior in the future, (admin) consent may be required again.
Prerequisites#
- Role: Global Administrator or (privileged) Cloud Application Administrator.
- Portal: Azure Portal – Consent & permissions.
Option A (fastest): Microsoft manages the consent settings#
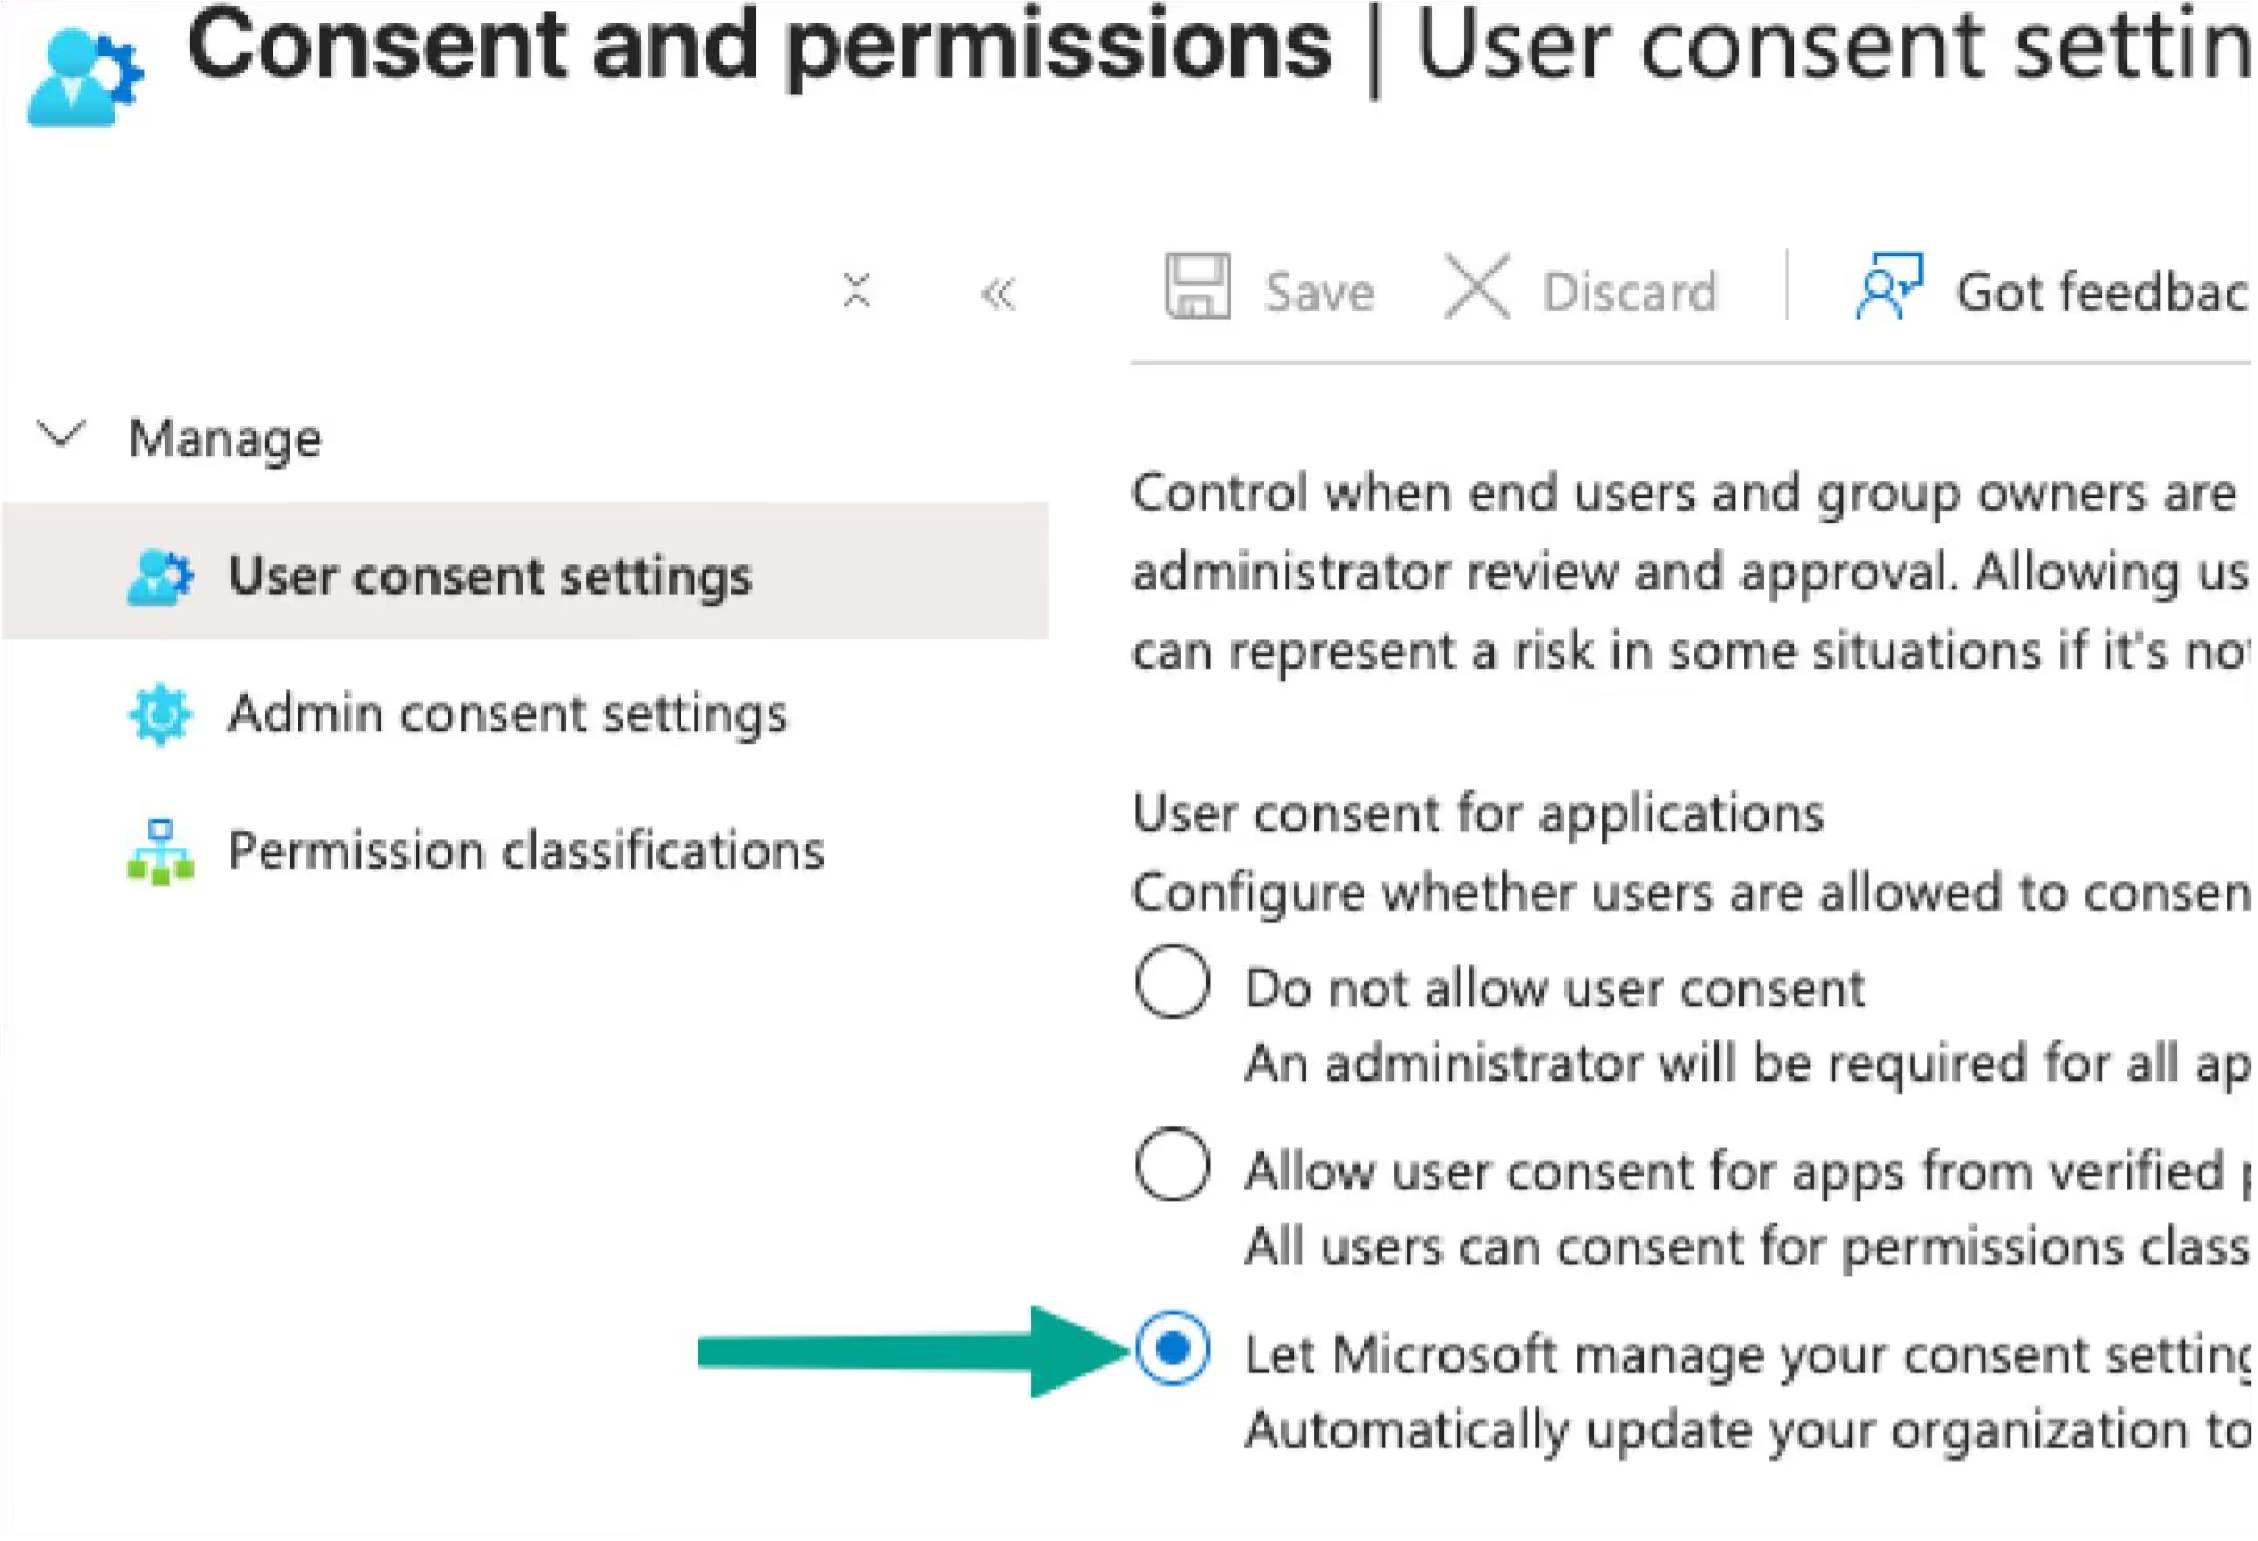
- Open: Microsoft Entra admin center → enterprise applications → Consent and permissions → User consent settings.
- Select: Let Microsoft manage your consent settings (Recommended).
- Click Save.
Option B: Allow user consent for ‘low impact’ permissions#
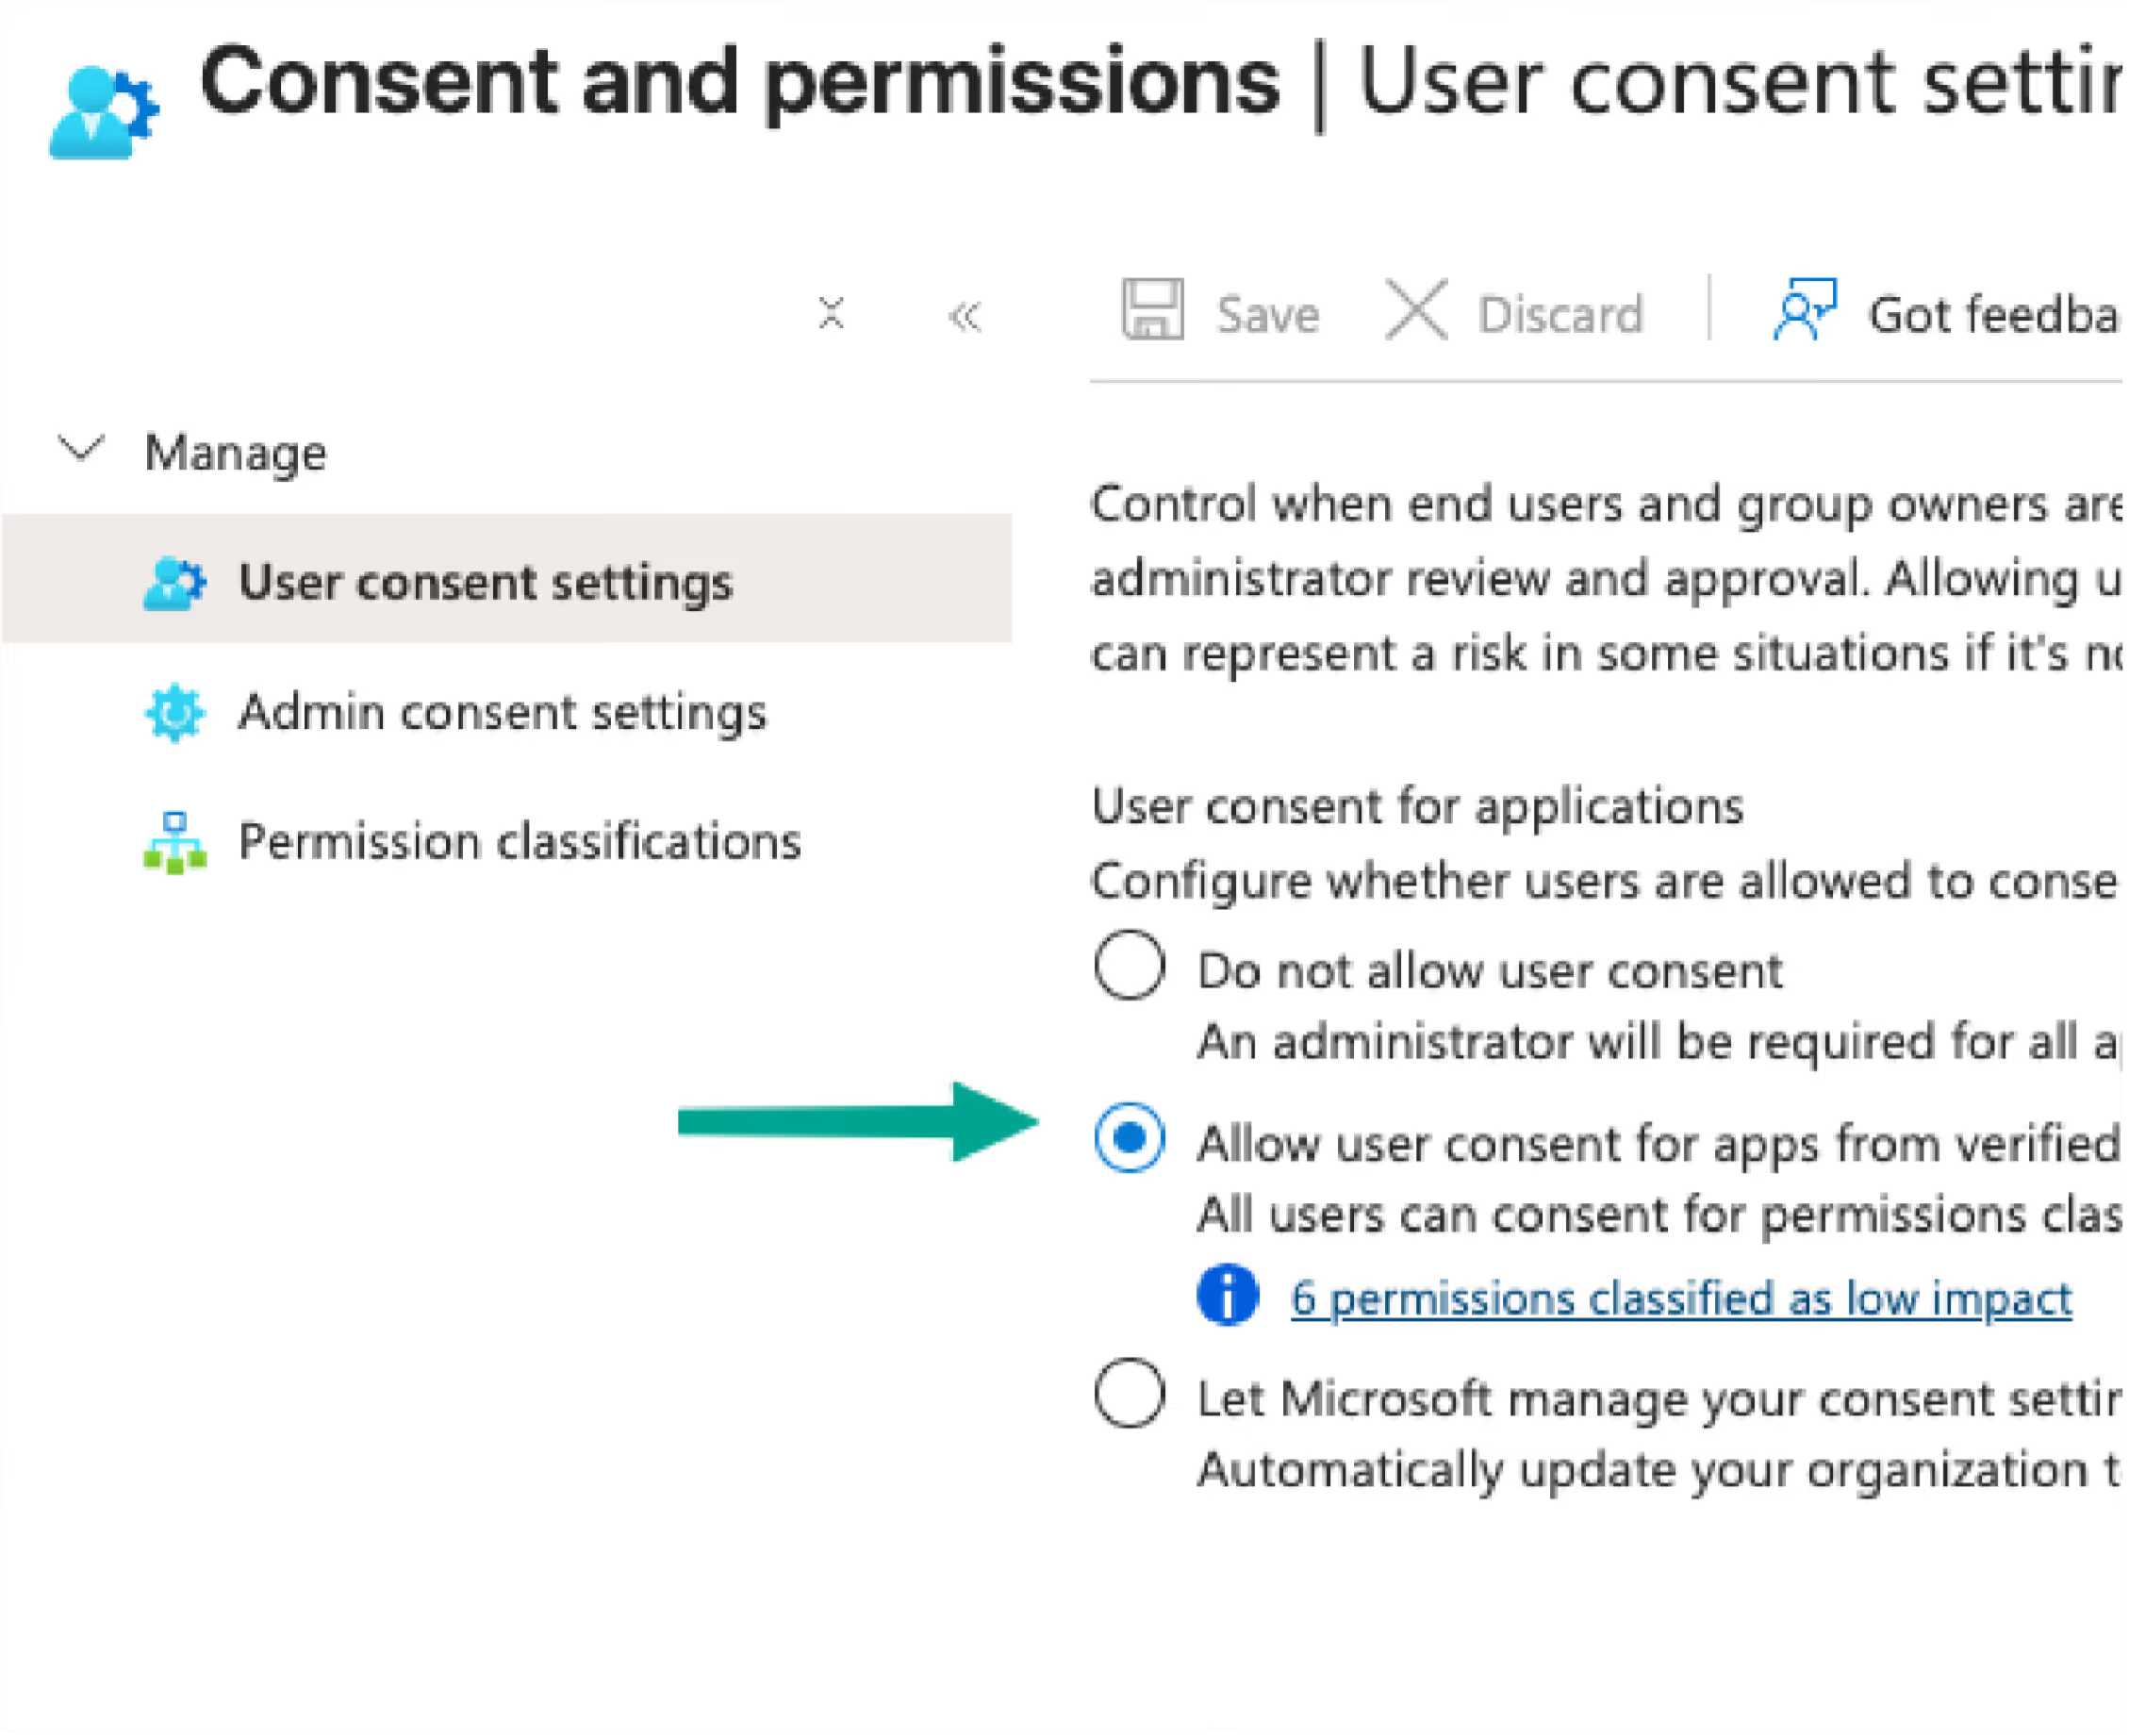
If you want to allow users to give consent themselves (without opening everything up), choose:
- Go to User consent settings and select: Allow user consent for apps from verified publishers, for selected permissions. Click Save.
Classify the required permissions as ‘Low’#
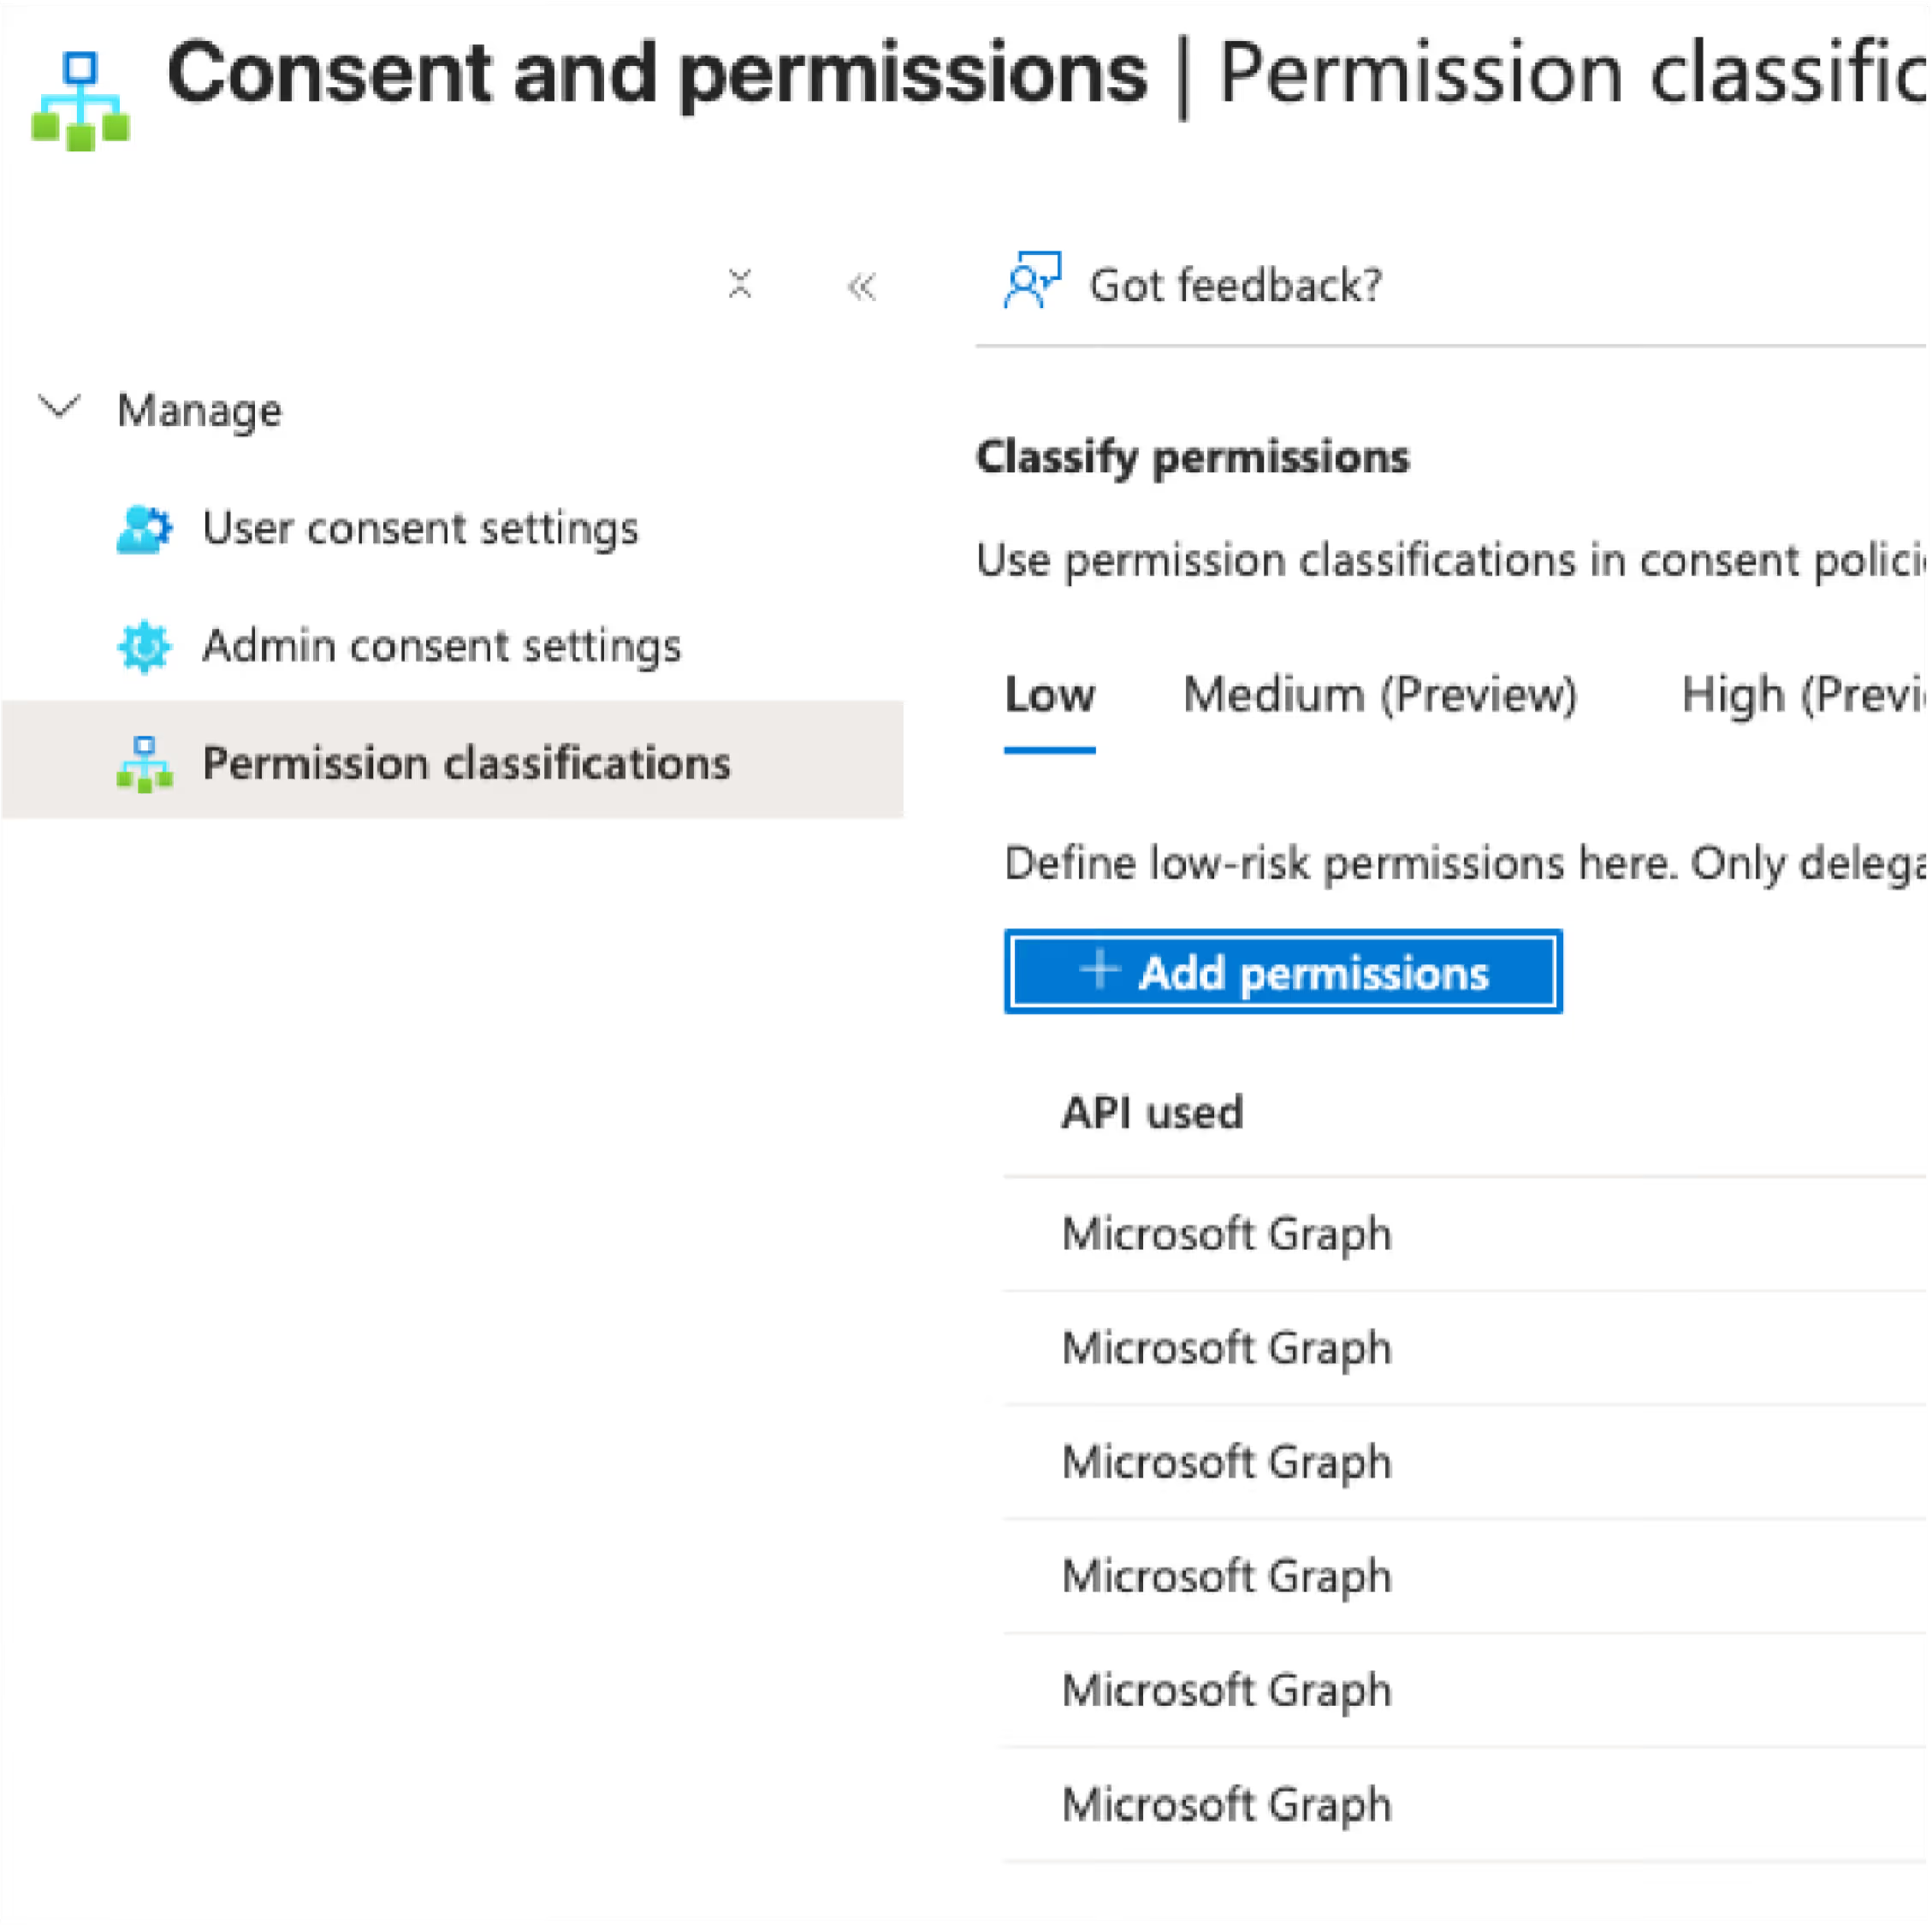
- Open: Consent and permissions → Permission classifications.
- On the Low tab → click Add permissions and add the delegated permissions listed below:
- Microsoft Graph - Mail.ReadWrite
- Microsoft Graph - User.Read
- Microsoft Graph - profile
- Microsoft Graph - openid
- Microsoft Graph - email
- Microsoft - offline_access
Click Save.
Figure 3 – Add the required Microsoft Graph permissions to the ‘Low’ list.
Note: Only delegated permissions that do not require admin consent can be added to the Low list. If your policy enforces “Do not allow user consent”, an administrator will still need to grant admin consent for the application.
Option C App-focused consent via App Registrations + Integrated Apps#
Use this option when you first deploy the FileCap add-in via Integrated Apps and then explicitly grant the required API permissions via the App Registration in Entra ID. This gives more control to administrators who do not want to allow user consent and prefer to grant admin consent in advance.
- Deploy the FileCap add-in via Integrated Apps
Open: Microsoft 365 admin center → Settings → Integrated apps.
Choose Manage add-ins and add the FileCap add-in.
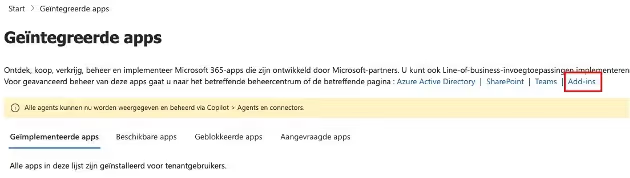
More information about the deployment can be found here: https://scribehow.com/viewer/365_add-in_uitrollen_voor_de_organisatie__EO_-LdFkRjihIUFiyKS_GQ
- Go to the FileCap App Registration
Open: Microsoft Entra admin center → App registrations.
Search for FileCap (this is the application linked to the add-in).
Open the app → navigate to API permissions.
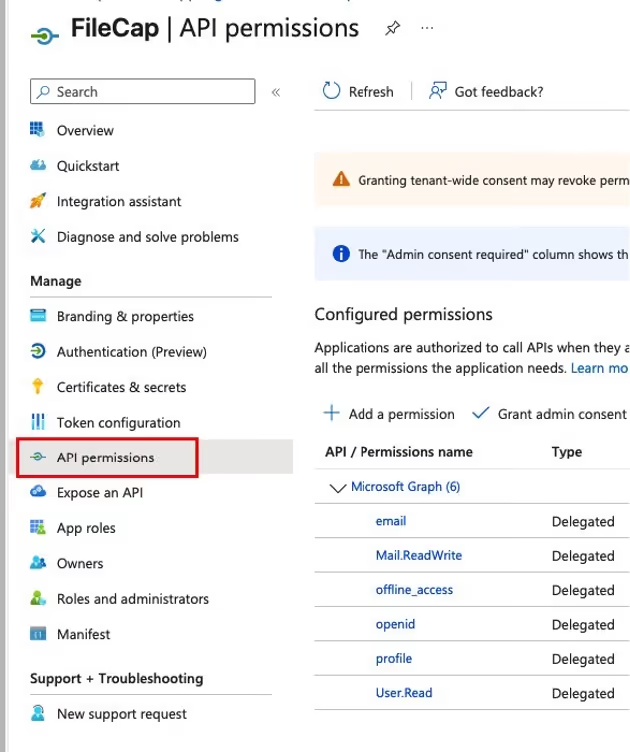
- Add the required Microsoft Graph delegated permissions
- Mail.ReadWrite
- User.Read
- profile
- openid
- offline_access
Validation#
- Sign out and sign back in to the FileCap app with a test user.
- You should see no admin consent prompt; the user can give consent themselves (Option B) or Microsoft applies the recommended guidelines (Option A).
Frequently asked questions#
Can you force this for us?
No. Consent policy is a tenant setting and requires a role with administrator rights at the customer.
What if Microsoft changes the classification?
Then an admin may need to grant consent again or reclassify the permission as ‘Low’.
Where do I find the pages in the portal?
User consent settings: link
Permission classifications: link
Contact: If you have any questions, please contact your FileCap contact person.